k8s.github.io
Prerequisites
- Apple Silicon System (M1/M2/M3 etc)
- 8GB RAM (16GB preferred).
- All configurations - One control plane node will be provisioned -
controlplane - If you have less than 16GB then only one worker node will be provisioned -
node01 - If you have 16GB or more then two workers will be provisioned -
node01andnode02
- All configurations - One control plane node will be provisioned -
You’ll need to install the following first.
- Multipass - https://multipass.run/install. Follow the instructions to install it and check it is working properly. You should be able to successfully create a test Ubuntu VM following their instructions. Delete the test VM when you’re done.
- JQ - https://github.com/stedolan/jq/wiki/Installation#macos
Additionally
- Your account on your Mac must have admin privilege and be able to use
sudo -
Clone this repo down to your Mac. Open your Mac’s terminal application. All commands in this guide are executed from the terminal.
  mkdir ~/kodekloud
  cd ~/kodekloud
  git clone https://github.com/kodekloudhub/certified-kubernetes-administrator-course.git
  cd certified-kubernetes-administrator-course/kubeadm-clusters/apple-silicon
Virtual Machine Network
Due to how the virtualization works, the networking for each VM requires two network adapters; one used by Multipass and one used by everything else. Kubernetes components may by default bind to the Multipass adapter, which is not what we want, therefore we have pre-set an environment variable PRIMARY_IP on all VMs which is the IP address that Kubernetes components should be using. In the coming labs you will see this environment variable being used to ensure Kubernetes components bind to the correct network interface.
PRIMARY_IP is defined as the IP address of the network interface on the node that is connected to the network having the default gateway, and is the interface that a node will use to talk to the other nodes and also to the internet. In bridge mode, this is also an address on your internal broadband network and is allocated by your broadband router.
Bridge Networking
The default configuration in this lab is to bring the VMs up on bridged interfaces. What this means is that your Kubernetes nodes will appear as additional machines on your local network, their IP addresses being provided dynamically by your broadband router. This facilitates the use of your browser to connect to any NodePort services you deploy.
Should you have issues deploying bridge networking, please raise a bug report and include all details including the output of deploy-virtual-machines.
Then retry the lab in NAT mode. How to do this is covered in the next section.
NAT Networking
In NAT configuration, the network on which the VMs run is isolated from your broadband router’s network by a NAT gateway managed by the hypervisor. This means that VMs can see out (and connect to Internet), but you can’t see in (i.e. use browser to connect to NodePorts). It is currently not possible to set up port forwarding rules in Multipass to facilitate this.
The network used by the VMs is chosen by Multipass.
It is recommended that you leave the pod and service networks as the defaults. If you change them then you will also need to edit the Weave networking manifests to accommodate your change.
If you do decide to change any of these, please treat as personal preference and do not raise a pull request.
Running Commands in Parallel with iterm2
iterm2 which is a popular replacement for the standard Mac terminal application can be used to run the same commands on multiple compute instances at the same time. Some labs in this tutorial require running the same commands on multiple compute instances for instance installing the Kubernetes software. In those cases you may consider using iterm2 and splitting a window into multiple panes with Broadcast input to all panes enabled to speed up the provisioning process.
The use of iterm2 is optional and not required to complete this tutorial.
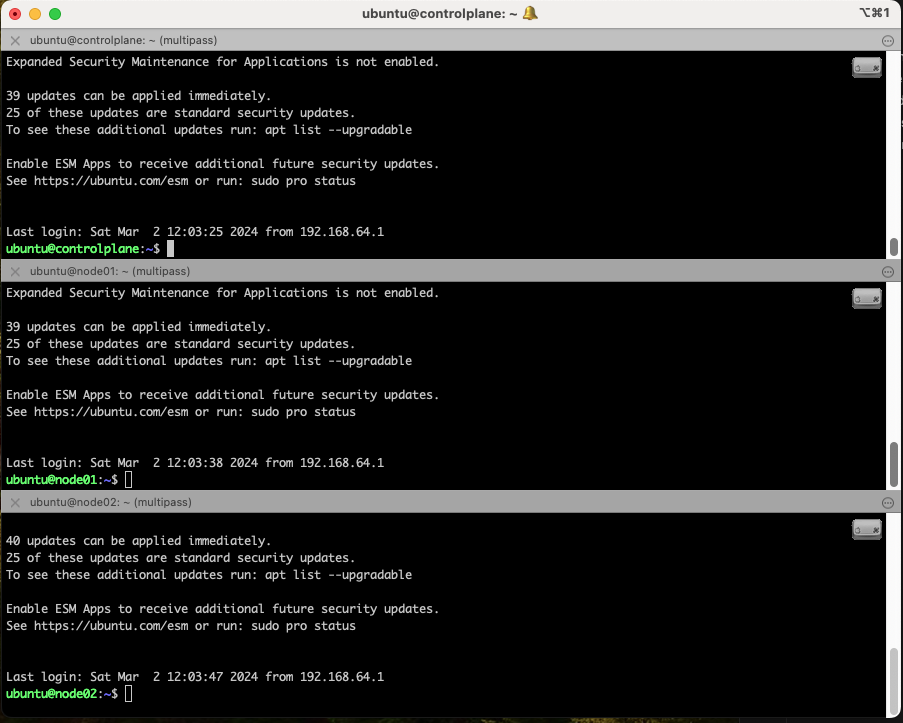
To set up as per the image above, do the following in iterm2
- Right click and select split pane horizontally
- Do this again to create the third pane (if building 2 workers)
- In each pane, connect to a different node with
Multipass shell - From the
Sessionmenu at the top, selectBroadcast->Broadcast imput to all panes. The small icon at the top right of each pane indicates broadcast mode is enabled.
Input typed or pased to one command prompt will be echoed to the others. Remember to turn off broadcast when you have finished a section that applies to all nodes.
Next: Compute Resources